Prism pipeline
![]()
The Aquarium plugin for Prism allow you to synchronize your project's assets and shots, publish media from to Aquarium and also create timelogs from Prism.
New features are coming ! Feel free to reach us if you have specific needs.
This documentation is for the Prism v1.3. The Prism v2 documentation is coming soon. More information about the v2 in our repository.
The code of the plugin is available in our Github : github.com/fatfish-lab/aquarium-studio-prism.
Check out the branchs and tags to see the different versions of the plugin.
Installation
- Open your command line
- Go to the Prism's dedicated plugin folder for ProjectManagers
Example :
C:\Prism\Plugins\ProjectManagers - Clone the repository in folder, with a custom directory name
git clone ssh://git@github.com/fatfish-lab/aquarium-studio-prism.git Aquarium
- Open Prism
- Go to
Prism's settings>Pluginstab - Enable
Aquariumplugin - Configure Aquarium integration in Prism
Alternative installation
If you are not familiar with git, you can download the repository from our Github, and paste the content in a folder named Aquarium in ProjectMangers folder in Prism's Plugins folder.
Example : Extract the content of the zip file in
C:\Prism\Plugins\ProjectManagers\Aquarium
Configuration
To be able to use the plugin in Prism, you have to enable it, in your project Settings :
- Open Prism
- Go to
Prism's settings>Project Settingstab - Enable
Aquarium integration - Add your Aquarium site url
- To get your Aquarium site url go to your Aquarium instance
- On the
Dashboardpage, go toOrganisationtab - In the
Developmentsection, click on theAPI url endpointto copy it - Paste it in Prism
- Click on the button
Save and go to 'User' tab to add your Aquarium credentials - Add your
emailandpasswordyou use to connect to Aquarium - Click on the
Signinbutton - Go back to the
Project Settingstab - In the
Aquarium projectlist, choose the corresponding Aquarium's project - Don't forget to save your modification by pressing the
SaveorApplybutton at the bottom of the window
Now, we need to configure Prism, directly from Aquarium's web interface :
- Go to your Aquarium instance
- Open the project's settings
- Go to the
Connectorstab and click onEnable connectorfor Prism pipeline v1
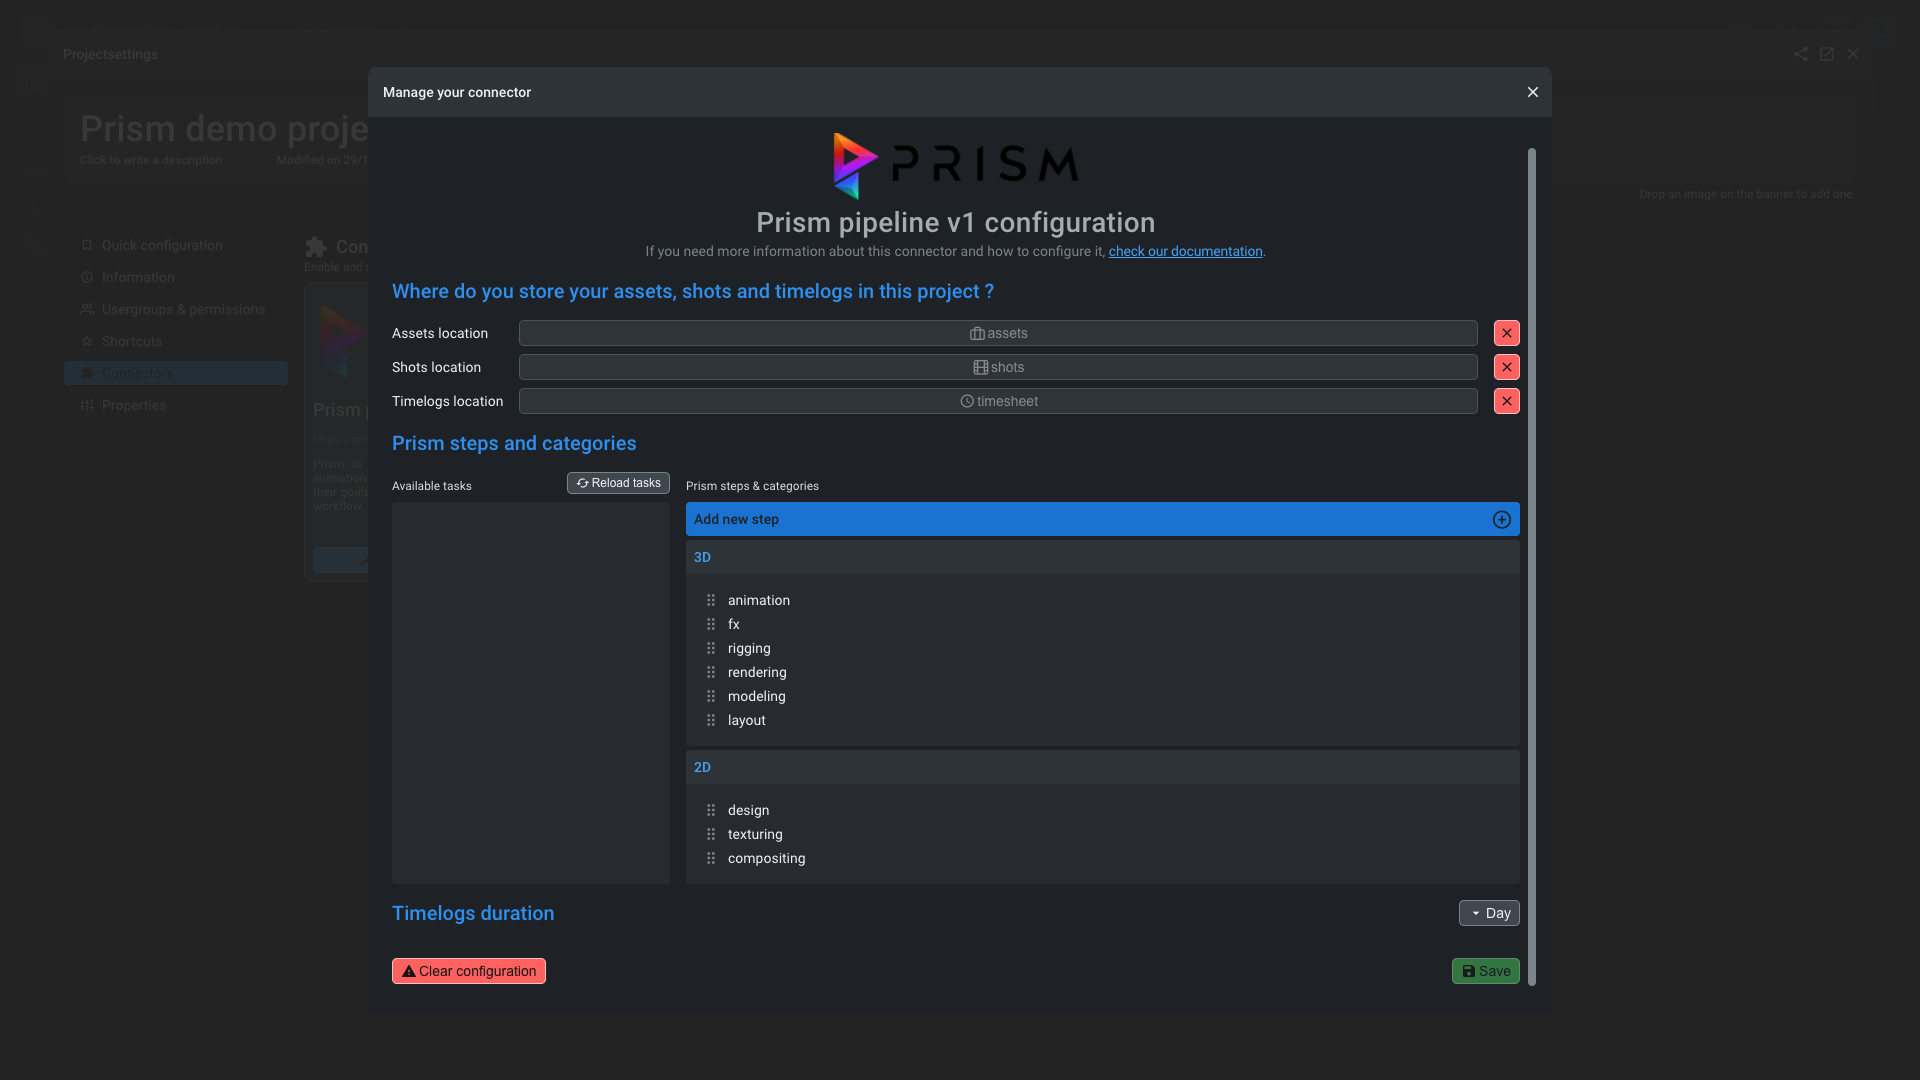
Where do you store your assets, shots and timelogs in this project ?
- Choose your assets, shots and timelogs locations by picking the folder where you store them.
- Those parameters are
optionnal. If you let them empty, the project's will be used instead.
Prism steps and categories
- Drag and drop the
Available tasksin Prismstepsto create the categories.
- In Aquarium,
stepsdoesn't exist. So you can organize them as you want- The
categorie names, need to match with the tasks name of your shots and/or assets to be synced by the connector- During
Aquarium to Prism sync, if a task doesn't exist, the category will be ignored
:warning: Don't forget to save the configuration before closing the window
Timelog duration
Choose the available inputs (day, hour and/or minute) for artist to add their timelogs
Use Prism naming convention
By using the Prism naming convention, you ensure compatibility of assets & shots names during sync.
Prism as specific requirements for naming assets and shots. If you didn't follow those requirements, you can enable this feature.
During the sync process, the connector will replace
-,_,and.by the allowed symbols, based on your Prism settings.
Update the plugin
To update your Aquarium plugin for Prism, you can use git commands
- Open your command line
- Go to the
Aquariumprism's dedicated plugin folder:C:\Prism\Plugins\ProjectManagers - Pull the lastest changes
git pull
- (Re)start Prism or use the
Reload all pluginsbutton in Prism's settings >Pluginstab
How to use the plugin
Once you configured the plugins, you can access to Aquarium tools fro mthe Prism Options menu :
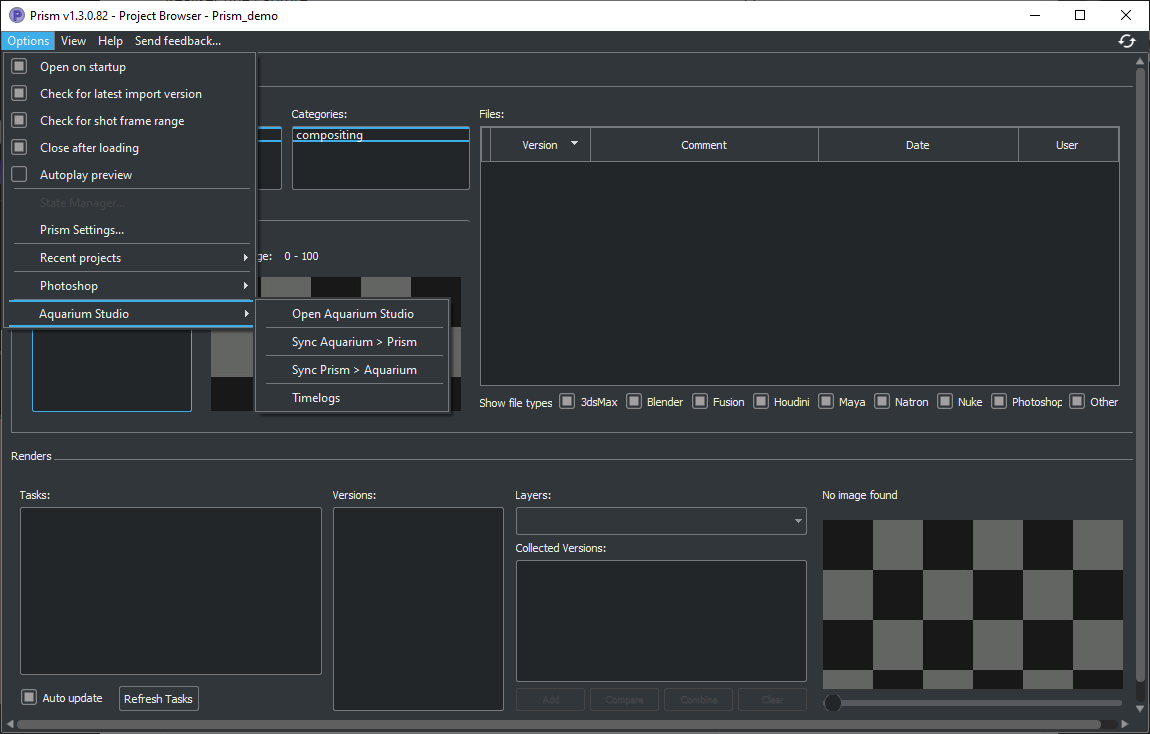
Open AquariumSync Aquarium > PrismSync Prism > AquariumTimelogs
Publish to Aquarium is available in the context menu (right mouse button) of the preview in Renders > Tasks section.

Open Aquarium
Open Aquarium in your browser, directly in the active project.
?> Not yet enabled
Sync Aquarium < > Prism
This menu allows you to sync your Assets and/or Shots data from Aquarium to Prism or Prism to Aquarium.
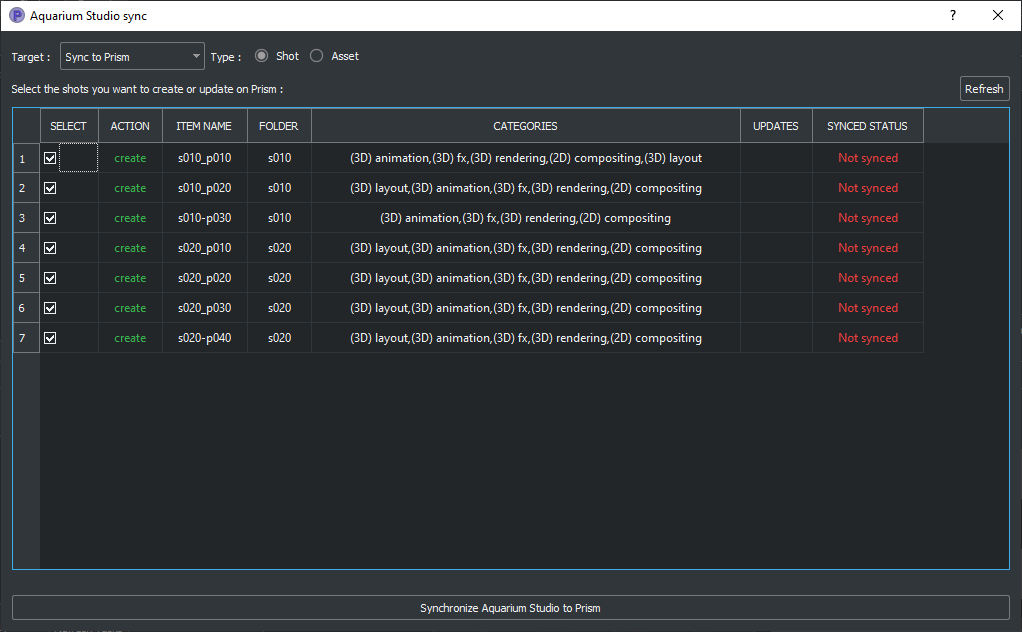
Before synchronizing the data, you will have a preview of the shots or assets that will be created, with the associated categories.
You can deselect items, with the checkbox on the left to exclude them for being synced.
!> The connector will never delete or trash data.
Timelogs
Every connected users can create timelogs from Prism interface.
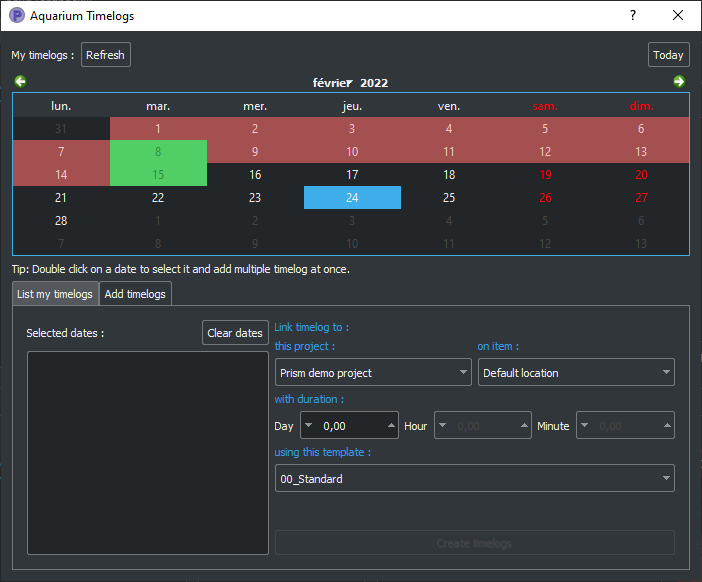
After selecting dates from the calendar view, you can create timelogs on specific project (active project is automatically selected). Fill the right duration and choose a Timelog template (optionnal).
?> You can double click on days, to create same timelog on multiple days.
Today you can't create timelog to specific task from Prism interface. If you need it, feel free to contact us.
Publish to Aquarium
When you right click on a image, sequence of image or video in Prism preview, you can upload this media directly on Aquarium.

Select the asset or shot (active item is automatically selected), choose the task under wich you want to upload the media and add a description (optional).
You can also update the thumbnail of the shot/asset with this media (optional).
Signout
If you want to signout your account, go to Options menu > Prism settings > User tab and click on Signout in the Connect to Aquarium section.
!> Signout action only remove the authentication token from your computer. It doesn't delete or remove Prism configuration or data.
Troubleshoot
If you have any issue with this plugin here is some lead :
- Check if an update of the plugin exist. Please refer to update section.
- Enable Prism
Debug mode, in thePrism settings>Miscellaneous.- With this mode enabled, Aquarium plugin will also be in debug verbose output.
- Prism logs are stored in the Document folder of the current user.
- Example :
C:\Users\fatfishlab\Documents\Prism
- Example :
- We are here to help you, so do not hesitate to contact us.